Widget Collector
Overview
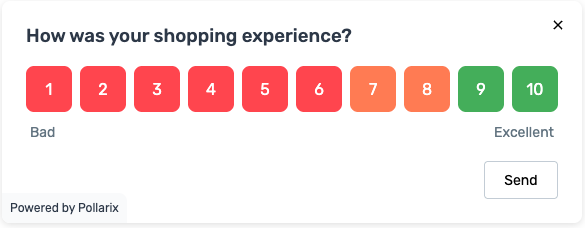
The Pollarix Widget Collector enables users to embed and customize interactive survey widgets on their websites. The widget supports a variety of themes and positions, offering a seamless way to collect user feedback while maintaining brand consistency.
Key Features
- Dynamic Positioning: Customize widget placement on the screen with four corner options.
- Theme Support: Toggle between light and dark modes to match your website's theme.
- Customizable Text: Edit titles, legends, and button text to suit your audience.
- Survey Integration: Directly integrates with Pollarix survey campaigns for real-time feedback collection.
- API Integration: Easy to configure via a simple JavaScript snippet.
Pollarix Widget Collector offers flexibility and ease of use, making it ideal for businesses looking to gather actionable insights efficiently.
Getting Started
Embedding the Widget
-
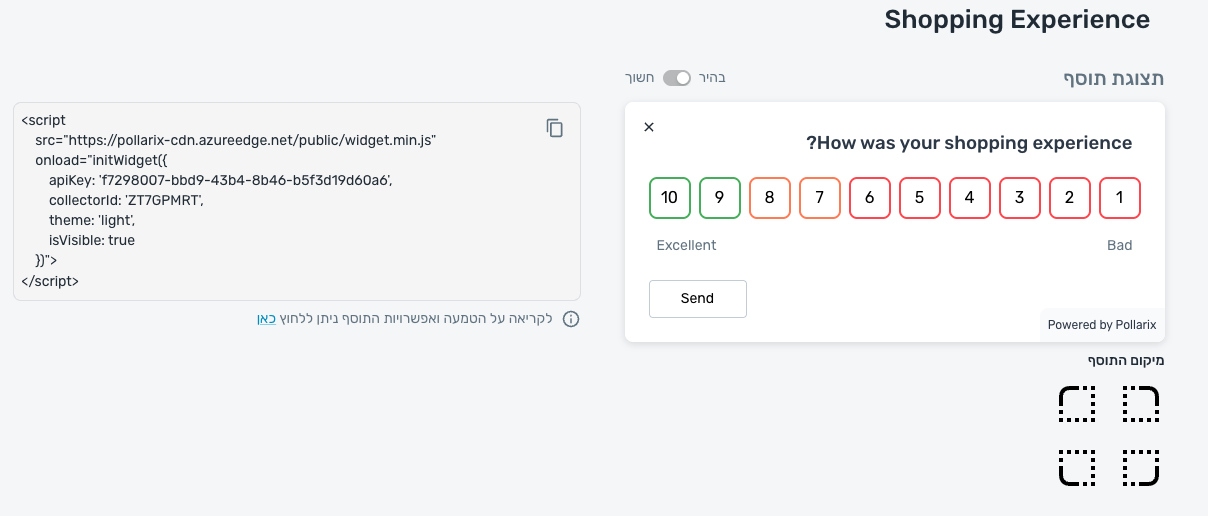
Copy the following script tag:
<script
    src="https://pollarix-cdn.azureedge.net/public/widget.min.js"
    onload="initWidget({
        apiKey: 'YOUR_API_KEY',
        collectorId: 'YOUR_COLLECTOR_ID',
        theme: 'light',
        isVisible: true
    })">
</script> -
Replace the placeholders:
YOUR_API_KEY: Obtain this from your Pollarix dashboard.YOUR_COLLECTOR_ID: The unique ID for your widget collector.
-
Paste the script tag into your website's
<body>section.
Use a test collector ID first to verify the integration before deploying to production.
Customizing the Widget
Widget Position
The widget can be placed in one of four screen corners:
- start-top: Top-left corner
- end-top: Top-right corner
- start-bottom: Bottom-left corner
- end-bottom: Bottom-right corner (default)
Theme
Switch between light and dark themes by setting the theme property:
initWidget({
   theme: 'dark'
});
Editable Text Fields
You can customize text for the title, low/high legend, and submit button from collector settings
Ensure the text length does not exceed the widget's display area to avoid truncation.
Advanced Configuration
API Key and Authorization
The widget requires an API key for authorization. To ensure secure communication:
- Obtain the API key from your Pollarix account.
- Use the
apiKeyparameter when initializing the widget.
Real-Time Visibility Control
Control the widget's visibility dynamically using JavaScript:
window.showPollarixWidget(); // To display the widget
window.hidePollarixWidget(); // To hide the widget
Toggle the widget's visibility based on user behavior, such as displaying it after a user completes a purchase.
Survey Submission
The widget automatically handles survey submissions. Responses are sent securely to your Pollarix dashboard. If additional logic is needed, integrate your backend API to process survey responses.
Troubleshooting
Common Issues
-
Widget Not Loading:
- Ensure the script URL is correct.
- Verify your API key and collector ID.
-
Positioning Issues:
- Check the
widgetSettings.positionvalue for typos.
- Check the
-
Text Not Updating:
- Confirm all text fields are passed in
widgetSettings.
- Confirm all text fields are passed in
Debugging
Use the browser's developer console to check for any JavaScript errors. Ensure you have proper network connectivity to Pollarix's CDN.
Use network monitoring tools to ensure the widget is fetching resources correctly.
Tutorial: Creating a New Widget Collector
-
Navigate to the Collector Section:
- Log in to your Pollarix dashboard and go to the "Collector" section.
-
Create a New Collector:
- Click on "Create New Collector."
- Fill in the necessary details like collector name and campaign settings.
-
Customize Widget Settings:
- Use the form to define the widget's title, legends, button text, and positioning.
-
Generate the Embed Code:
- Once saved, the dashboard will generate an embed code.
- Copy and paste this code into your website.
-
Preview and Adjust:
- Use the preview feature to test your widget.
- Modify settings as needed.